How to Take Better Food Photos for Your Restaurant Menu With a Phone
You do not need a professional camera to improve your menu photos. With better light, framing, and a consistent process, a phone can produce much stronger images.
A bad photo can hide very good food.
It happens in restaurants, cafés, bars, bakeries, and small food businesses all the time. The dish leaves the kitchen looking great, but the photo is taken in poor light, from an awkward angle, with a cluttered background, or with colors that do not look like the real food.
The result is a menu that tells customers what you sell but does not do much to help them imagine what they are about to order.
The good news is that you do not need to start by buying a camera, building a photo studio, or hiring a photographer every time your menu changes. For many restaurants, a modern phone, a window, and a few minutes of preparation are enough to make a noticeable improvement.
This guide walks through a simple process for taking food photos for a restaurant menu that look consistent, appetizing, and realistic without turning restaurant operations into a photography production.
Before you shoot: choose which dishes deserve a photo
The first mistake is trying to photograph everything at once.
If you have 50 menu items, you do not need 50 photos on day one. Start with the dishes where a strong image can make the biggest difference.
Prioritize things such as:
- best-selling dishes;
- high-margin dishes;
- new items you want to introduce;
- visually distinctive food;
- dishes whose names do not fully explain what they look like;
- items where presentation is an important part of the value.
Also consider dishes you use in social media, promotions, or other marketing. A well-organized shoot can create assets for several channels, not just the menu.
The goal is to build a small collection of genuinely useful photos before trying to create a huge library.
1. Photograph the dish as customers actually receive it
A menu photo creates an expectation.
If the picture shows a tall burger packed with ingredients but the customer receives a completely different sandwich, the image stops being a sales aid and becomes a source of disappointment.
Prepare the dish the way it will actually be served.
Do not add ingredients just because they look good in a photo if customers will not receive them. Do not make the portion artificially large. Do not use a side dish that is not included.
You can absolutely improve presentation. Clean the rim of the plate, arrange the ingredients carefully, and choose suitable tableware. But the final image should still represent the real product.
That matters even more for digital menus and delivery: the photo should help customers order with confidence rather than make a promise the kitchen cannot keep.
2. Try a window before buying equipment
Start by finding a large window with plenty of natural light.
Place the table near the window and, when possible, let the light come from the side. Side light can reveal texture, volume, and detail without making the dish look completely flat.
Avoid placing the dish directly under a strong ceiling light. It can create harsh shadows and strange color casts, especially when mixed with daylight.
You do not need direct sunlight hitting the plate either. Soft, indirect light is usually easier to control.
A simple setup
You can start with:
- a table near a window;
- the finished dish;
- a simple background;
- your phone;
- a white napkin, card, or board to bounce some light back toward the darker side.
A white surface opposite the window can act as a simple reflector and soften shadows.
Test this setup before buying equipment. For a small restaurant, the improvement from better light can be much larger than the improvement from replacing a good phone with an expensive camera.
3. Clean your phone camera lens
It sounds obvious, but it is one of the easiest things to forget.
Your phone lens touches hands, pockets, tables, and other surfaces. A small amount of grease can reduce contrast and make the image look hazy.
Wipe the lens with a suitable microfiber cloth before you start.
Also check the camera glass itself. There is no point trying to fix an image later if the original photo already lost sharpness because of a dirty lens.
4. Choose the angle based on the food
There is no single correct angle for every dish.
Overhead
A top-down view works well for pizza, bowls, salads, boards, breakfast spreads, and dishes where the overall shape and ingredient arrangement matter.
It can also create a clean, graphic composition.
Around 45 degrees
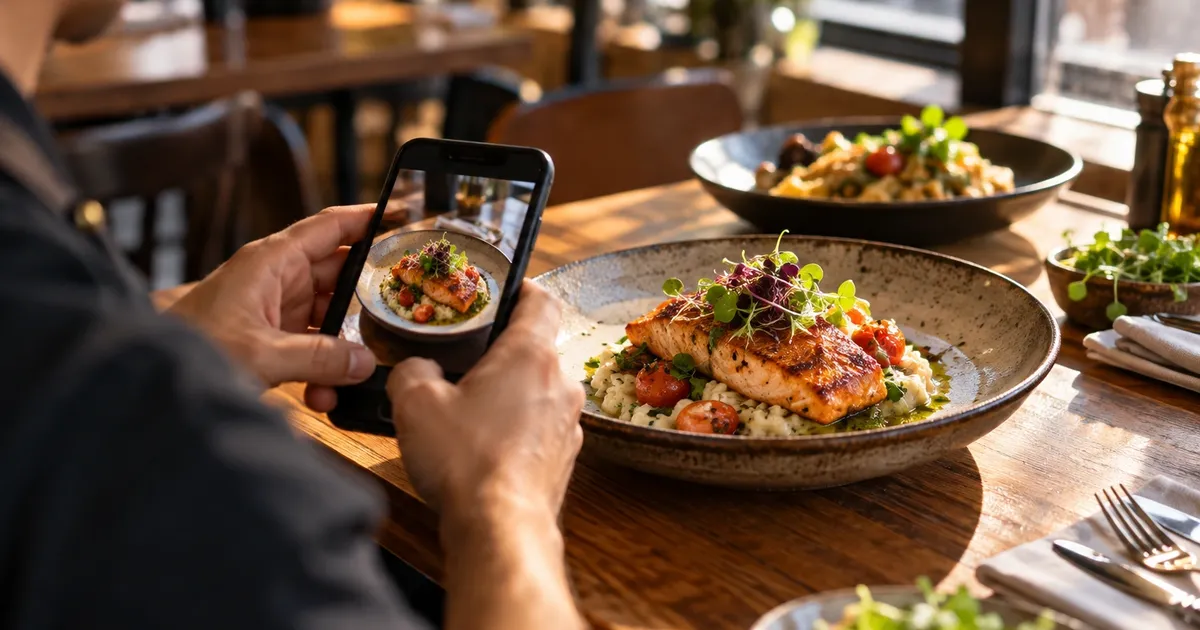
This is a strong starting point for main dishes, pasta, burgers, and meals served in bowls or plates. You can show the surface of the food while keeping some sense of height and depth.
Closer to plate level
This can work particularly well for burgers, sandwiches, layered desserts, and drinks. The goal is to show volume and texture.
Take two or three variations. Compare them side by side and choose the image that makes the food look appealing without changing how the dish actually looks.
5. Avoid unnecessary digital zoom
When possible, move the phone closer instead of relying on heavy digital zoom.
Frame the dish clearly without cutting off important elements. Leave a little room around it so you can crop later if needed.
Also be careful with very wide camera modes if they distort the edges. For small dishes, a more controlled perspective often looks more natural.
If your phone has multiple lenses, test which one gives you the most natural perspective at the distance you can realistically shoot from.
6. Keep the background simple
The food is the hero.
A beautiful restaurant table can help tell the story of your business, but it should not compete with the dish.
Use only a few supporting elements:
- a napkin;
- cutlery;
- a glass;
- ingredients that are actually part of the dish;
- a small plant or environmental detail when it fits the restaurant.
Do not use everything at once.
A useful test is to look at the photo for two seconds. If you notice the vase, bottle, patterned tablecloth, or decoration before you notice the food, there are probably too many competing elements.
For a menu, simplicity is usually an advantage.
7. Shoot soon after plating
Food changes quickly.
Sauces lose their shine, greens wilt, fried food loses texture, ice cream melts, and drinks stop looking as fresh.
Prepare the process before the plate is ready. Set up your phone, choose the composition, and then finish the dish.
If you are shooting several items, agree on a sequence with the kitchen. Do not let a finished dish sit for ten minutes while you decide where the camera should go.
A short, organized shoot usually produces better photos than taking random pictures during a busy service.
8. Keep a consistent visual standard
One excellent photo can look strange next to ten completely different images.
Choose a few rules for your restaurant:
- similar image proportions;
- similar lighting;
- a related background;
- a similar camera distance;
- consistent color treatment.
The dishes do not need to look identical. Each food item should keep its personality. But the collection should feel like it belongs to the same restaurant.
This matters especially in a digital menu, where customers scroll through several categories. Visual consistency communicates care and organization.
9. Edit to correct, not to invent
Editing can improve a food photo significantly, but there is a line between correcting the image and creating a dish that does not exist.
Start with simple adjustments:
- exposure;
- contrast;
- white balance;
- shadows;
- highlights;
- cropping;
- moderate sharpening.
Be careful with saturation. Food that is pushed too far toward red, orange, or yellow can look artificial and create the wrong expectation.
Check white balance as well. Pasta that should look warm can appear blue if the camera misread the lighting.
Before publishing, ask: “Does this photo look like the dish that comes out of my kitchen?”
If the answer is no, take a step back.
10. Make the photo work on a phone screen
A digital menu photo will not necessarily be viewed on a large monitor.
The customer may be holding a phone in one hand while talking, waiting for friends, or quickly looking for something to order.
That means tiny details do not help if the overall composition does not work on a small screen.
Keep the dish as the focal point, use good definition, and avoid framing it so far away that the food becomes a tiny object inside the image.
Before publishing, open the image on a phone and check whether it is still attractive without zooming in.
11. Think about speed, not just image quality
A huge image file can hurt the experience if it takes too long to load over a mobile connection.
The answer is not to destroy photo quality. Prepare a web-friendly version with enough dimensions for the menu and sensible compression.
Keep your original files at full quality. Use optimized versions for the live menu.
This matters because the best food photo in the world cannot help if a customer gives up before it appears.
12. Create a small process for updating menu photos
Do not treat menu photography as a project that happens once every few years.
When the presentation of a dish changes significantly, its photo should be reviewed too.
A simple routine can be:
Every month: review new, removed, and changed dishes.
After a meaningful presentation change: check whether the photo still represents the dish.
Each season: choose a few items to photograph again.
After every shoot: keep the original files organized by dish name.
This makes future menu updates much easier.
What if I do not have professional photos for every dish?
Do not wait for a perfect photo library before publishing your menu.
Start with the most important items and improve the collection over time.
A restaurant with ten strong, real photos can look more convincing than one with forty inconsistent, generic, or heavily edited images.
If you are still building your digital menu, our guide to creating a free digital menu gives you a way to get started without turning the project into a large technical implementation.
Then apply the principles from our guide to creating a restaurant menu that sells more: photos are only one part of the experience, alongside categories, descriptions, prices, and the right item emphasis.
And if you use QR codes at the table, see how to improve the customer experience with a QR code menu. Good photos still need to live inside a fast, readable, easy-to-navigate menu.
How to use your photos in Qrdapio
Qrdapio lets restaurants add images to digital menu items. That means you can start with priority dishes, publish the menu, and replace images as your photo library improves.
The workflow can stay simple:
- choose the priority dishes;
- photograph them in an organized session;
- select the strongest images;
- make a light, consistent edit;
- add the photos to your menu items;
- open the public menu on a phone and review the result.
If you are moving an existing menu into a digital format, Qrdapio’s menu creation tools can also help speed up item setup. Review names, prices, descriptions, and images before publishing.
Technology can reduce the operational work. The quality of the photo still starts with the food, the light, and attention to detail.
Quick checklist for menu photos
Before publishing an image, check:
- [ ] Does the photo show the exact dish you serve?
- [ ] Was the phone lens clean?
- [ ] Is there enough light, preferably natural light?
- [ ] Is the food the focal point?
- [ ] Is the background simple?
- [ ] Does the angle suit the type of food?
- [ ] Is the image sharp enough?
- [ ] Do the colors look realistic?
- [ ] Is the editing free from excessive saturation?
- [ ] Does the photo work on a small screen?
- [ ] Is the file optimized for fast loading?
- [ ] Does the style match the rest of the menu?
Frequently asked questions
Do I need a professional camera to take restaurant food photos?
No. A modern phone, good light, and a consistent process can already produce much stronger images. Professional equipment matters for certain commercial shoots, but it should not be the first barrier preventing a small restaurant from improving its menu.
What is the best light for food photography?
Soft natural light, especially near a window, is an excellent starting point. Avoid mixing many light sources with different color temperatures, and be careful with very harsh direct light.
Should I photograph food from above or from the side?
It depends on the dish. Overhead photos work well for pizza, bowls, and flat compositions. Around 45 degrees can show depth in main dishes. Lower angles can make burgers, sandwiches, desserts, and drinks feel more substantial.
Should every menu item have a photo?
Not necessarily. If you cannot maintain quality and consistency, start with the most important dishes. A small set of strong photos can be more useful than a menu filled with weak ones.
Can I use AI-generated images in my menu?
You can, but there is an important limitation: the image should represent the real product. If AI changes ingredients, portion size, or presentation in a way that creates a false expectation, the image stops doing its job as useful menu information. For a menu, authenticity should come before visual effects.
What image format should I use for a digital menu?
Use a web-optimized format and keep the original files separately. The goal is to balance visual quality with fast loading, especially for customers using mobile data.
The best photo is the one that helps a customer decide
Menu photography does not need to be a competition over equipment.
For most restaurants, the biggest improvement comes from simple things: a good window, a well-plated dish, a clean background, a consistent angle, and editing that respects what the food actually looks like.
Then turn those choices into a process. Photograph a few dishes at a time, keep a consistent standard, and update images when the product changes.
Your menu does not need to look like a photography catalog. It needs to make a customer look at a dish and think: “That is what I want to order.”
When those photos live inside a fast, organized, easy-to-update digital menu, they become more than attractive images. They become part of the buying experience.